Pages

Monday, June 10, 2013

Finches.


Four little finches, relaxing on this Monday afternoon...

Wednesday, June 5, 2013

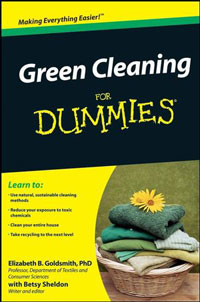
Two Green Cleaning Books: A Review.

Working at a library certainly has its benefits, and one of my favorite parts is how often I hear about interesting books, from patrons and other librarians alike. Librarians, generally speaking, seem to be pretty green people, which is awesome, because I get to hear about books such as these:


I love the idea of green cleaning, and if you do, too, then you may enjoy these books. However, these books are helpful for different things.

Green This! is not only informative, but also an interesting read. All profits of this book go to Imus Ranch, which helps and empowers kids with cancer, which is pretty awesome in itself. If you are on the fence about whether or not to switch to green cleaning methods, reading this book will almost certainly convince you to go green. Reading about all the chemicals used gave me an eerie feeling, and I am more ready than ever to switch pretty much everything for a more green alternative. However, if you want recipes for homemade cleaners, this is not the book for you. The author makes a lot of recommendations for eco-friendly and non-toxic products, but does not give recipes. Some of the information regarding essential oils is interesting, but often unclear of how much to use. Over all, I would say this book is more informative and convincing--definitely worth reading, and especially helpful if you are looking for where to buy eco-friendly cleaners.

Green Cleaning for Dummies is full of green alternatives to the toxic ways we are used to cleaning. Not only does it give several recipes, but it also gives short, sweet, easy to understand alternatives to how you may be cleaning your home. Here is an example recipe:

Minty Fresh All-Purpose Cleaner

2 tbs peppermint liquid castile soap
1/4 cup baking soda
1/4 cup vinegar
water to fill 1 quart spray bottle

*mix all ingredients in bottle. Spray on cloth, mop, or directly on surface

It is not only incredibly informative on how to clean, but it also delves into an equally important issue of keeping your home free of dust mites, stress, etc., as opposed to just getting rid of the toxins.

Both of these books have been interesting to read, and I look forward to utilizing their tips and tricks.


Sunday, June 2, 2013

All-Natural Disinfectant.

I love all the recipes I find on Pinterest for natural cleaning solutions! I've been using infused vinegar for some time now (I even got my skeptical boyfriend to love the stuff!). Now I am finding myself branching out a little with the homemade cleaners. This recipe is a little more in-depth than some you'll find, but it really works well!


You will need:

A spray bottle (I got the one pictured at Big Lots for a few bucks, and I love it)
1/2 cup lavender-infused vinegar--see below (or, alternatively, use white vinegar and 10 - 20 drops of lavender essential oil)
1 tsp washing soda
2 cups hot, distilled water
10 drops tea tree oil (or more!)

To do:

If you choose to infuse the vinegar with lavender, simply combine a tablespoon of lavender buds with hot vinegar in a jar, and let sit for a week or so. Strain. Easy as that!

Combine the vinegar and washing soda together (there will be some fizzing/bubbling), next add the castile soap and hot water (not boiling). Let cool, and if desired, add a few more drops of essential oils of your choice (I'd recommend tea tree or lavender).


This disinfectant works well on most surfaces, but due to the vinegar, do not use it on granite or marble. The washing soda makes it very effective against grease, so I especially like to use it on my stove top. Enjoy your homemade disinfectant!

Natural dishwashing.


Maybe it's weird, but I love to wash dishes. A huge pile of dishes may be daunting at first, but it really isn't that bad. My family has never used a dishwasher, ever. As in, I am 20 years old, and I had never used one until I met my boyfriend a year ago. Yes, our house has a dishwasher. Growing up, it was used as a second pantry! We stored food in it instead of using it. We always hand wash, and I have played a role in the dish washing process since I was very young. As I've gotten older, I've found myself truly enjoying washing dishes. It's relaxing! However, when I move out this August, I will have a dishwasher in my apartment (with a roommate who will probably want to use it!), so who knows if I'll change up my routine. But as for now, this is what I like to use to wash my dishes.

Castile Dish Soap.

There are several tutorials online for turning a bar of soap into liquid soap. Just type it into a search engine and you are sure to find something. I personally take half a bar of Kirk's Castile Soap, grate it up, add it to 10 cups or so of hot water on the stovetop, and add about a tablespoon of glycerin. Once it is mostly cooled and thickened, I mix it really well with my stand-up mixer as I add about half a cup of vinegar and several drops of lemongrass essential oil. It smells lovely for dish washing! It can be added to a pump, a squeeze bottle--whatever you desire for your kitchen. So far it has worked well and gotten the dishes plenty clean.

Natural Sponges.

Sponges suck. Buying them sucks, too. My newest idea is buying one of those big (6 inches or so) natural loofahs, and cutting them into five or six sponges! I have found these at Big Lots for only $1.50--which is great, considering I'll get several sponges out of it. The best part is that I can compost it when I'm finished (assuming I used only natural cleaning solutions with it).

Cutting it into pieces can be tricky. The best method I've found is to get the entire sponge drenched, place it on a cutting board, and use my sharpest knife to cut through it. 


The sponge does not scratch non-stick surfaces, and it works really well for cleaning stainless steel. So far I'm super impressed, and I plan to continue using it. And of course, when it just isn't right for the job, I use a washcloth or rag.

Friday, May 31, 2013

No shampoo, 30 days later.

You may notice that I only say "no shampoo," as opposed to "no shampoo, as well as the oil cleansing method." More on that later...

The last time I used shampoo was Tuesday, April 30th, the day of my Junior Standing Jury here at EIU (which I passed, by the way). Since then, my hair has gone through tremendous ups and downs. Some good, some bad, and some in between. I should have taken a picture that day, but silly me, I didn't think of it. Here are some pictures that were taken within a month of me starting this challenge:


Cooking tofu stir fry, of course. See my hair? Long, pretty thin, kind of dull and limp.

Dad and I at the greenhouse. My hair is long, as you can see, but it's pretty thin and limp.

Here's the low down:

Week 1:
Hair was disgusting. After four days I used a ton of baking soda. Hair felt cleaner, but still really oily compared to what I was used to. So I waited two days and used more. I continued this for the first week. My hair still felt sticky, or damp, or something, but the ends were somewhat dry, even though I was using apple cider vinegar.

Week 2:
One day this week, I curled my hair for a concert. It was the weirdest smell--like burning scalp--even though I had used the baking soda. The curls barely held, because I didn't want to put anything in my hair to hold them. That was frustrating, but I continued trying. Still keeping up with the every other day baking soda washes, my hair was feeling incredibly sticky and frizzy in the back of my head, even though my hair looked clean. I wasn't sure what was going on. I also noticed my hair feeling especially tangled, which got me pretty bummed.

Week 3:
Dry. My hair was so dry, I thought it was all going to break off. It was incredibly tangled, still, but dry, frizzy, and just not feeling right. I ended up putting some vegetable glycerin in it one night (before I went to bed) toward the end of this week, which helped a lot, but it was still feeling pretty dry the next day.

Week 4:
This week started off much like the previous week. My hair was okay, but pretty dry. Then, on Saturday, the 25th day of no shampoo, something happened. My hair felt absolutely glorious. So soft, very little frizz, volume, and the ends were hydrated and healthy looking! Here's the thing, though. That morning, I took my shower at a house about two hours south of where I live, where there is very, very soft water. So I was left to wonder, can a difference in water really change things that much? Since then, though, my hair has still been pretty soft.

Consensus:

This challenge has been pretty interesting. It was really difficult for the first week or two, and in the end, am I totally happy with my hair? Well, I'm not sure yet! I think I need another few weeks to really decide. My hair is definitely much softer at the top, and much more voluminous, too. That's the really big thing I've noticed--so much more natural volume to my hair. It feels like it isn't being weighed down. However, the ends are dryer than I'd like, in general, and my hair tangles so easily--it can be a huge hassle to de-tangle it in the morning. I have a feeling this is because it's so long, though. This is why I'd like to give this challenge at least a few more weeks before I make a final decision. Below is a picture of me with my 'poo-free hair. Completely natural. Washed with baking soda, rinsed with ACV, air-dried, and brushed.

Hair. Feels healthy, looks fairly healthy.


So what about the oil cleansing method?

Well, about a week and a half in, my face broke out like crazy. I mean, really, really bad. Maybe it had nothing to do with it--who knows! However, I was desperate, so I switched to using only the Castile Soap with tea tree oil, then used aloe and tea tree oil as a moisturizer/acne fighter. My face is looking really good these days. I am still sort of experimenting, but I've found that the Castile Soap is working great as a cleanser, and I alternate between vegetable glycerin and coconut oil as a moisturizer. It has been working really well.


Friday, May 24, 2013

How do we teach music?

While I may not bring it up too often in this blog, my primary "job" is a musician, and more importantly, a music teacher. And though I may not yet have my degree, I give bassoon lessons to several students, and have recently found myself with opportunities to instruct larger groups of young musicians.

Pictured below is a very influential woman in my life, Mrs. Ginger Stanfield. Mrs. Stanfield recently had her very last concert, after teaching band for 35 years. She was my beginning band director 10 years ago, and fortunately, as I have lived in the same town since then, we have kept in touch. As a music education major, I have done much of my observation time with her. Through this, I have seen both sides of the process: I was once her student, and now, as a future music educator, I have observed the meaning behind her methods.

(source)
I believe there are two key things Mrs. Stanfield does that make a difference:
1. System. There is a noticeable system in her band room, and the students know it. They follow all of her guidelines, and they know exactly what the consequences will be if they don't. She sets up classroom management from the very first day.
1. Music. Mrs. Stanfield not only teaches the students how to make sounds on their instruments. She teaches them dynamics, phrasing, and musicianship from the very beginning. It may not sound as beautiful as we'd like, as these are only fifth and sixth graders. However, they are learning music.

I believe these two things are the key to starting musicians, as opposed to starting a beginning band.

But back to my story...

I have taught several students so far in my college career, and it is easy to see the differences among how some students perceive music.

To one of my students particularly, music is all notes. Nothing more. Hardly even rhythm, sometimes. I can say 1,000 times how I'd love to hear this whole note go from a piano to a forte, and there will never be even the slightest difference. I can use analogies, examples, and spend 15 minutes on one whole note, and sadly, it will always be about two seconds long, mezzo forte, and have no purpose whatsoever.

I hope I'm not a bad teacher. I really do. My other students have been different, so that must mean something, right?

For example, one of my other students, who is about five years younger than the student I just mentioned, is a musician already. Not only does he play about three other instruments, but he plays bassoon like a real champ. I don't say this because he plays the right notes. I say this because as a 12 year old, he follows the dynamics, takes breaths where they naturally occur, and asks how he can make certain lines sound better.

Here's the thing. I think I have nothing to do with the above situations. I really think it's got nothing to do with me. I think it has to do with their first music teacher, or their first band director.

This is why I try not to get so bummed about the first student I mentioned. I just continue to teach lesson after lesson, waiting, because one day it's going to click. She's going to make the most beautiful sound on that bassoon, and the reason I'm going into music education will, once again, seem just right.

Sunday, May 19, 2013

Quinoa Vegetable Salad.


I am generally guilty of eating a lot of wraps and sandwiches for lunch. And of course these things can be awesome (and they usually are), but when I kept seeing this recipe on Pinterest, I knew I had to check it out. The original recipe comes from The Garden Grazer, and it can be found here. Through this recipe, I also found the blog itself to be wonderful, and I would highly recommend looking at it! But back to this delicious recipe. I changed it just a little from the original, so I would recommend taking a look at both to see which suits your tastes!

You will need:
1 cup of uncooked quinoa
1 can of garbanzo beans (mine was 14oz)
2 tomatoes, seeded and diced
1 bell pepper (I used green because it was what I had at the time)
1 can of corn, rinsed and drained
4 green onions (more or less to taste!)
2 tbs olive oil
1.5 tbs lemon juice
2 tsp dried basil
feta crumbles to taste (omit for vegan diets, of course!)
fresh ground pepper to taste

To do:
Cook your quinoa according to these instructions, if you have never done it before. Meanwhile, make your dressing by whisking together the olive oil, lemon juice, and basil. Set it aside. Chop the veggies into small pieces, drain the corn and garbanzo beans, and set aside. Combine everything, including dressing, into a large bowl, and mix thoroughly. Add feta, if desired. Season with fresh ground pepper, and mix again.

I have had this in the fridge for five days now (I just finished the last of it) and it kept just fine. Make a big batch and eat on it for a while. Yum!